Thursday 7 August 2014

Putting back together

Thursday 7 August, 2014.

After painting the engine bay - which I'm not completely happy with, but it's only an interim measure until we paint the entire car red next year - started putting bits back in and the contrast to how it used to look and how it's going to look is vast.

This weekend will be spent putting most things back in.


Still have to put the refurbished carbies in; the alternator; dizzy; radiator and then connect everything. Fill it with appropriate fluids and then see if Harold starts. Then the fun will begin with tuning carbies and the like

Thursday 12 June 2014

Master Cylinders


June 2014

Every bit from the engine bay that’s been taken off and refurbished/renewed is sitting in my study (wife is really happy about that – but it’s warmer than the garage) waiting to be put back on, but everytime I consider putting it back I kook at the engine bay and see something else that needs to be cleaned or replaced otherwise it makes the new stuff look 
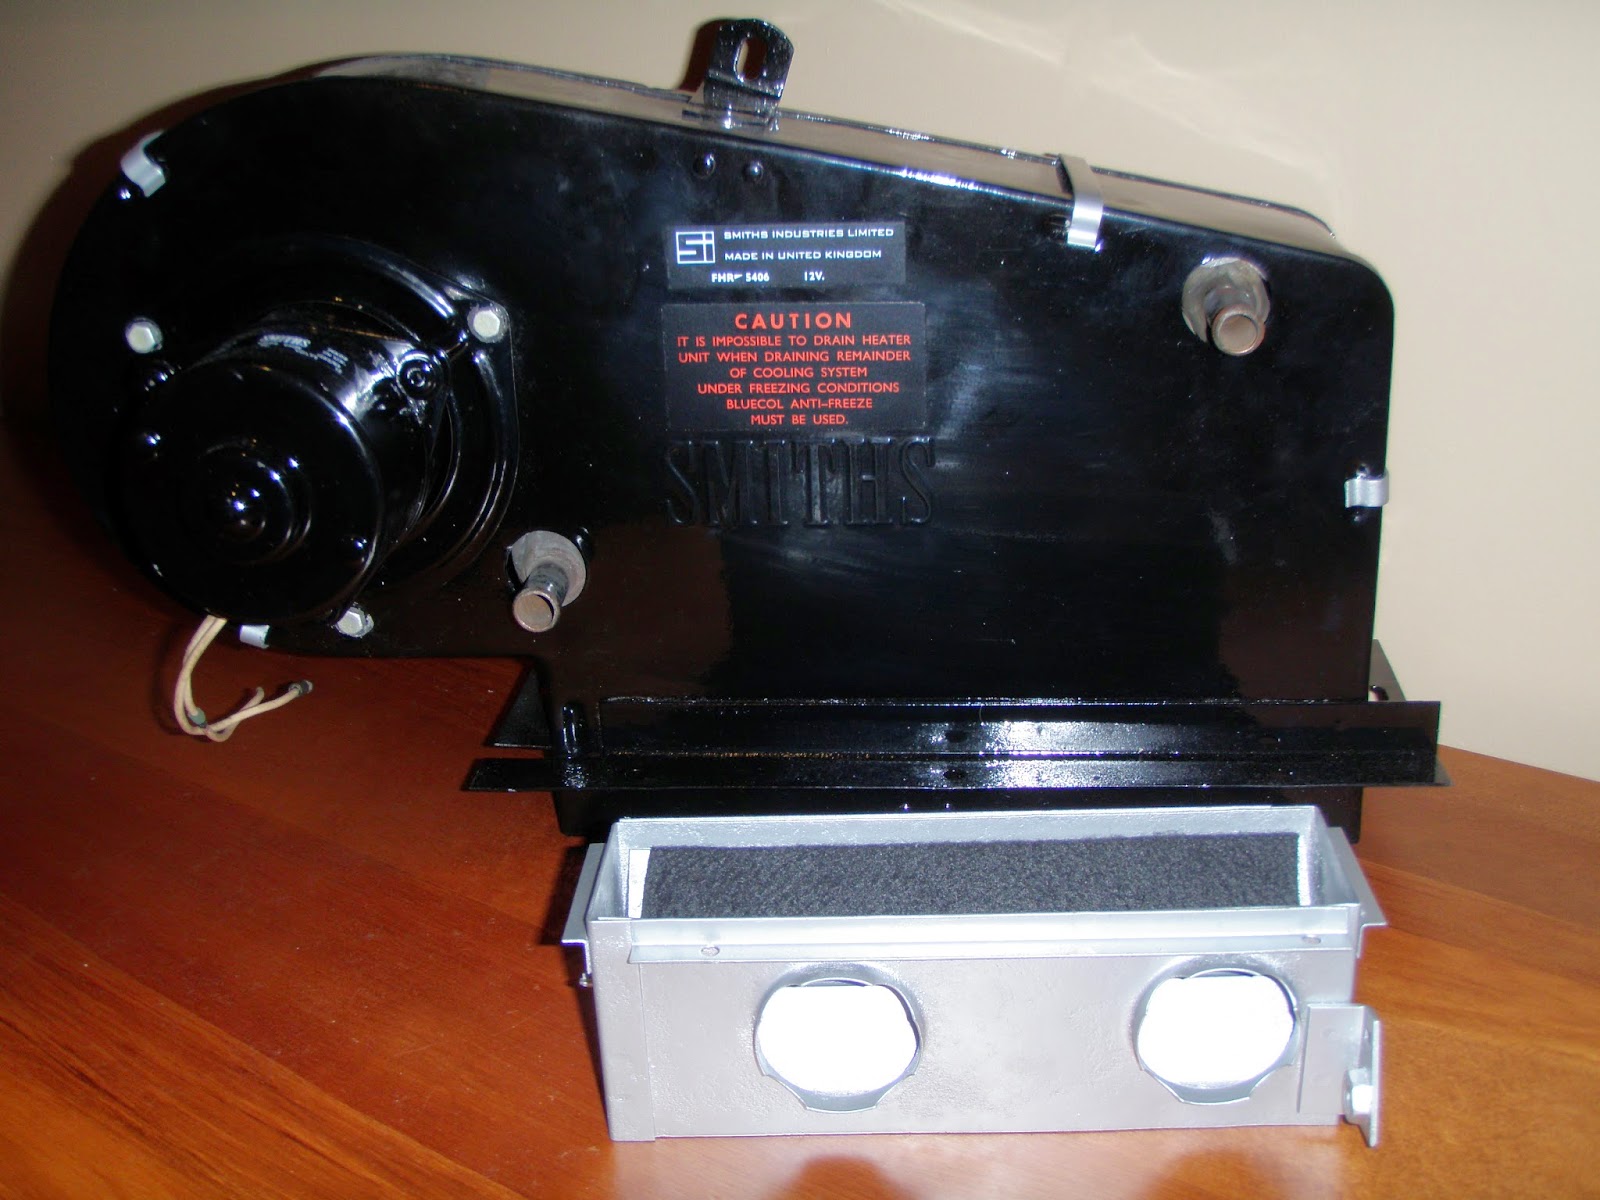
ridiculous. So, the carbs, heater box manifold, rocker cover, etc have all been renewed or rebuilt and looking pleasingly good and now I’ve taken the pedal box out and the clutch and brake master cylinder because, what with the combination of spilled brake fluid from the master cylinders and water leakage over the years from the heater box, there is a significant amount of manky surface rust in the area and I can’t in conscience put anything back until the area is cleaned up, scraped back, primed and painted. 

Of course, when you start taking more stuff off, it can’t go back after refurbishment because it’ll make everything else look tatty. Guess I have no choice now but to start pulling all the bits and bobs out of the engine bay in order to eventually remove the engine and transmission enabling a full engine bay stripping, priming and repainting.

Every nut, bolt, washer, spring, screw or other component is carefully labelled and bagged in a ziplock bag. My policy is to renew all the little things like screws, washers etc, but I still want to bag the originals up so that I know what goes with what. I’m also almost paranoid about the amount of digital pictures I take in order to document every bit on the car so that I can refer back when I query where this or that piece goes.

June 1, 2014

Time to pull the brake and clutch master cylinder out. Jeez, it’s rusty! Pulled the pedal housing off and saw the mess the pedal hinges that push the hydraulic cylinders in. Plenty of WD40 sprayed liberally over every movable joint a, nut, bolt and washer. Next day I attempt to remove the hinge bolt holding the pedals to the piston actuators. Stuck.Rusted.Welded. Fortunately Riley had refurbished the seats and greased up the tracks but we hadn’t reinstalled them giving us better access to under the dash and more crucially, the pedal area. Riley got under the dash (he’s younger, smaller and more agile than me!) and removed the pedal springs and then it should’ve been simply a matter of removing the nut holding the hinge bolt on in the pedal box and then sliding the pedals off, removing the master cylinders and then a standard disassemble. The hinge bolt was not budging from the pedals. 

There is a separation sleeve on the hinge bolt between the pedals that had rusted into position and if there was room between the wing and the pedal box, one could get a persuader tool and whack it into submission, but there is a gap of about 3 inches that isn’t quite enough to get any force applied to the hinge bolt to dislodge it. Unfortunately there is a bend in the clutch pedal that makes it impossible to pull the pedal box out from the hole in the firewall with the pedals still attached to the hinge bolt. The bolt must be removed for the pedals to be removed for the master cylinders to be removed.

We spent about an hour using WD40, brute force, impassioned pleading, false promises and bargaining to try and remove it, all to no avail. Left it overnight to permeate.

Next day Riley and I took a more considered approach to the problem and upon reflected deliberation used brute force to squeeze the pedals together and just rip it out from its housing with the thought in the back of our minds that we can always replace anything we might break. 

As it turns out, it was the only way to do it. Ended up having to break the copper pipe that connects from the clutch to the clutch master cylinder, but that was a sacrifice that had to be made as it was the only way to help remove  the master cylinders. It was always going to be easier to replace it with a new one for about $15. Quite happy to spend that money rather than spend more frustrating time on trying to remove it.


June 2, 2014

More time just spent wire brushing every part on the pedal box, master cylinders and the housing. Takes a few hours to do and then to prime every component where necessary. Also, the actual Master Cylinder canisters have been wire brushed back and then polished with Autosol/ Edelchromglanz metal polish. After a day to cure, the primed components are then given the first of three coats of paint with a rub down in between every coat with 600 grit wet and dry paper before finishing with a couple of coats of acrylic clearcoat.

In the meantime, we’ve made an order once again with MGOCSpares on the UK for a range of stuff and not just for the cylinder box.

June 6, 2014,

Picked up the parcel of spares from DHL at the airport.Got it home and Riley and I excitedly tore into looking at the parts we’d bought. We’d bought a couple of new tin screw caps for the cylinders instead of the plastic ones that are currently on them Put them on. Very nice!


In the meantime, wirebrushed and cleaned up the rust on the surface of the backwall areas where the heater box and pedal box was and because I’m not quite ready to pull everything off, I taped up a few bits and bobs surrounding the area and quickly primed the wirebrushed and sanded places to prevent any further rusting giving that as it’s getting into winter over here, moisture is hanging around in the air.

Seats


10th May 2014
Seats. The seats were in reasonable condition, but the passenger seat diaphragm (the big stretched rubber mat thing holding the foam and guts in) was knackered and had collapsed the foam out of the seat frame. Bought two new ones (may as well do both) for around £25. Pulled the seats out, pulled the old diaphragm away, removed and cleaned the covering, wirebrushed, primed and painted the frame, de-rusted the retaining clips, cleaned, painted and greased the rails, renewed the bolts to the body pan and seats are sweet. Took a few hours for everything and got two refurbished seats for just a little more than about $60.

Tuesday 27 May 2014

Heater Box


5th April 2014

The Heater Box and electrolysis. What a mess! Obviously as the heater box uses hot water recycled through the radiator, the chances of a water leak over the past 45 years of its life was always high. And apparently it has leaked and working in conjunction with the Master cylinder box, they’ve put on a brilliant show of trying to outdo each other competing to see who can make their respective areas the mankiest! I think it’s a draw.

Was pretty straightforward to rip the heater box out but it was a right git trying to remove the cable attached to the heater flap. Not looking forward to trying to put that back in.

The box was full of surface rust and after pulling the five retaining clips off and ripping the guts out of it, tested the water radiator reservoir (or whatever it’s called) and it was still solid and not leaking. It was far too intricate and fiddly to spend wire brushing so made up a solution of water with soda ash and stuck it in a bucket of water using the battery charger with one lead connected to the cathode and one to what would be now the anode and used electrolysis overnight to rid the rusty box of its surface rust. Worked well and after drying and cleaning, was ready for some zinc primer and a repaint.


Made sure the water reservoir thingy was cleaned and the fins straightened with an air conditioning condenser comb. Motor was pulled apart, cleaned, painted and reassembled. Everything has been zinc primed before painting with 4 coats of paint and a 2 clearcoats. That will be the minimum standard for all painted items on the car. Don’t know if that’s too much or too little, but I’m at peace with the numbers.
Ready for installation once I've got the rest of the engine bay ripped out and painted.


Carbs and Air Filters


Weekend of 14th March 2014 – Long Weekend

My everyday drive is parked behind the MG and everytime we started up the 'B, he blew black smoke onto the white paint of the car behind. Black, carbon smoke is fine - it's if it's blue(oil) or white (water) that it starts to get a bit nasty. At least with black smoke it's indicative of a too-rich mixture, which can be caused by a number of single or collective events. Thought I'd change the air filters at least and then tickle the mixture screws until I got the correct mixture, but then I thought it could well be the needles or jets in the SU carburettors. Looking at the manky state of the carbs made the decision easy to now pull them off for a rebuild.
Pulled off the air filter housings, which were in a bit of a bashed and rusted state. Ordered new air filters from the UK and after panel beating the housings back into shape, taking all the existing paint off them, they were rust primed, painted in gloss black, and clear coated as a finish. For the piece de resistance, I’d previously ordered an original set of decals of which there were two stickers to go onto the air filter housing. Pleased with the job as it turned out.


Commenced pulling the SU Carburettors off for maintenance.Needed to really have a look at this because the exhaust was spewing out quite black smoke. At least it was black and not blue or white, which would indicate quite a big problem in terms of oil burning through passing over the piston rings etc, which would be a big job. Instead, the black smoke indicates that the mixture entering the engine from the carbies is too rich. Riley and I had a quick look to see if we could adjust the mixture via the various screws and stuff around the carbies and realised it was all too filthy. Used some degreaser, but it didn’t get them clean enough so then we took the carbies off the manifold area and once they were off it became obvious how badly filthy they were and it’s no wonder there was black smoke being delivered. Right then, big job and need new parts. MGOCSpares sell a SU Rebuild kit for less than £70


As seen in the attached pic, we needed to totally strip the carbs down and clean each component. This was done initially with using thinners to get the majority of grease and grime off and then when we realised we couldn’t get into the nitty gritty bits, we fashioned a venturi bi-carb of soda blaster coupled to the newly acquired air compressor.Worked a treat to clean them thoroughly. Then washed them off n clean water and let them out in the sun to dry. Ordered from mgocspares a carbie renewal kit in order to change the needles and jets, gaskets and pipes, butterfly and bushes.Do it once, do it well. At the same time, we pulled the Intake manifold off and the manifold heat shield (Which has a couple of bits of crumbling asbestos attached to it and I’m not too sure of the direction I take with it yet). These all need cleaning and refurbishing with paint etc.

When the rebuild kit arrives from the UK then we’ll rebuild the carbies prior to reinstallation. Mind you, typical of most renovation projects, as soon as you renew one piece, all the rest looks desperately sad and in need of restoration too. One thing quickly begets the next. We took the existing faded red rocker cover off and briefly replaced it with the new gleaming aluminium cover. It looked like we’d just sprinkled a turd with glitter. With all the engine head looking quite rusty, the new cover looked ridiculous. So, one of the next jobs is to pull the head off and repaint it in an engine heatproof red along with the thermostat housing and then at the same time I’ll need to replace all the water hoses and fuel hoses too.

1st April 2014

Tonight I’m tackling the carbie heat shield – will sand back, prime and thinking of painting it gloss black, but in two minds about painting it silvery kind of colour. Dunno, but Riley and I will come to some decision about it.

Decided to use the same Flame Proof paint used for heat shielding on the exhaust manifold.

 
15th April 2014
 
It's taken a lot of time because I've only really managed to play around with the carbs  for a few minutes each night, but quite pleased with the end result. Unfortunately I put on new stickers and didn't line the right-hand air filter sticker up as neatly as I should've. Ah well, lessons learned and all that.


Fuel Pump


After cleaning the boot and refurbishing it I asked Riley to start the car for a bit of a warm up. It wouldn’t go and after the usual looks at the fuel filter and stuff thought that it might be the immobiliser. Checked the spark from the plugs and all OK so it must be fuel. None coming through the filter and none reaching the carbies. Bugger! New fuel pump needed. Went underneath and then took off the rear wheel for a look and couldn’t make out the kind of fuel pump on it as it didn’t look anything like the pics of them either in the spare parts catalogue or even of the ones posted on line. Anyway, turns out to be a New Zealand OME pump from a while back so obviously this is at least the second pump in its life. Went on line and ordered an original SU Fuel pump with new braided houses. Also bought a few bags of seals and grommets and a grab bag of 7/16” and ¼” assorted bolts – makes sense if paying for the postage.

The new SU pump arrived but I didn’t research properly and so discovered that it comes without banjo fittings. Quick order through to MGOCSpares to get the fittings – postage was more than the spares! Waiting for another 2 weeks for the parts.

Eventually get the new fuel pump and go to fit it on and then I notice a couple of extra wires going from one of the connections on the fuel pump onto the boot. Now remember, the boot has been scraped and rubbed and things disconnected and painted again. Followed the wired into the boot and they end at a toggle switch near the back where the old speakers were once placed in. Obviously while refurbishing the boot, I’ve gone and knocked the toggle and not knowing what it was for, didn’t consider it of any importance. Turns out it’s a cheap anti-theft idea of isolating power from the fuel pump. Put the new SU on the shelf

Anyway, got Harold going by putting the old pump back on and toggling the switch in the boot from “Off” to “On” so that we could drive to the annual MG Show & Shine car display in Bayswater. Going through the Graham Farmer tunnel, dropping down through the gears was a noisy bit of fun in an old convertible British sports car! Joined the MG Car Club of WA club on the day too. Driving back down the freeway and through the Poly Pipe again, there was an orange MGBGT ahead on our right; a beautiful MGTC ahead, an MGTC behind and a red MGB beside us going through the tunnel and dropping down through the gears and up again brought about some brilliant exhaust burbling noises! So glad we got Harold ready for the weekend in time!

The Boot


Decided to tackle the boot and remove all the crappy flooring mats (or what was lft of it) and then clean it all out. When we pulled up the flooring there was a bit of surface rust there and the rest of the floor and the metal work was covered in Waxoyl – a weather sealant. Took a couple of weekends to remove, scrape and sand it all down. In the meantime, Riley had taken the boot lid off (which wasn’t fitting properly anyway – it was proud above the body on the passenger side. When taking the boot off, the hinges were noted to be a bit bent and this could’ve contributed to the boot sitting high on one side. Anyway, removed from the car, the boot lid was scraped down, and sanded back to bare metal. Riley then rust primed it and then began spray painting in green for a few coats and then clear coat finished, came out very nice indeed – especially for a first time. In the meantime, the boot was finished getting back to bare metal and was rust primed and also painted green. When finished, it looked very good – well, certainly good enough considering it will be carpeted shortly, so that we won’t see the green paint, but we know it’s there and that we’ve not taken any short cuts.

Ordering some moulded boot carpets off MGOCSpares ready for installation into the boot and that's why we merely removed all the rust and did a "good enough" job on the paintwork as it will be covered up

The Purchase


25th November 2013 Monday morning, browsing through the Gumtree.com.au ads for MGBs and I notice this one that had come on the night before. I’d been looking for a few years and this one seemed to fit the bill nicely. After some frustrating text messages trying to get a viewing organised, managed to be able to pop round on Wednesday morning, 27th November 2013 and after a quick test drive, bought it for full price.

It is a bit rough, but for $5,000 it’s licensed, driveable, no rust. It rattles a bit and there are a few alarming noises coming from it; the speedo, tacho and overdrive don’t work and the dash is a little tatty.
Grumm has kindly offered to pick me up from work to go around and pick it up from Applecross. The previous owner has had it since 1995 and did a full bare metal respray back then including welding new plates on the floor panels. The car was originally white and resprayed to BRG on the outside, but the engine bay and the floor panels along with the inside of the boot betrays its original colour.


After picking it up this afternoon (28th November 2013), I’ll drive it home and start taking photos of it, of which some will form part of this restoration blog. I’m thinking initially that the first things that need to be looked at (of the things identified when I popped around too view it) is:

1.    Speedo fix – probably just renew the cable

2.    Tacho fix – probably a cable renew like the speedo

3.    Universal joints on the rear of the tail shaft , which are currently “clunking” with a slight rattle after disengaging clutch on gear change

4.    Oil change and grease up – need to source and buy a grease gun

5.    Vinyl roof is shagged, so that’s going to need replacement and/or substituted with a tonneau

As this is going to compose a part of Riley’s 2014 year 9 end-of-year project, we will start by creating an outcomes document that will guide us as to what we want to achieve and prioritise those achievables. A project plan can then be developed along with costings per component and timeframes per component. There will be plenty of variance and more than likely, scope creep. We’ll  try to reign in costs by fixing things ourselves and sourcing the cheapest parts where possible

.